Top 10 InShot Editing Tips for Beginners

If you’re new to video editing and looking for an easy-to-use app, InShot is a fantastic choice. It’s perfect for beginners who want to create professional-looking videos without much hassle. In this article, we’ll walk you through the top 10 InShot editing tips to help you get started and make your videos stand out.
If you’re just starting with video editing, check out our Beginner’s Guide to InShot Features to understand the basics before exploring these editing tips.
Start with a Clear Plan
Before you dive into editing, it’s essential to have a clear idea of what you want to create. Think about the purpose of your video and the story you want to tell. Are you making a tutorial, a vlog, or a promotional video? Having a plan will help you stay focused during the editing process and make the final product more cohesive.
Understanding the InShot Interface
Before you start editing, it’s a good idea to get familiar with the InShot interface. When you open the app, you’ll see three main options: Video, Photo, and Collage. To start editing a video, tap on the “Video” option. You can either create a new video or select an existing one from your phone’s gallery.
Once you select your video, you’ll see a timeline at the bottom of the screen. This timeline lets you trim, split, and rearrange your clips. Above the timeline, you’ll find tools like Music, Text, Filters, and Stickers. Knowing where these tools are and how they work is the first step to getting comfortable with InShot.

1. Import Your Media Correctly
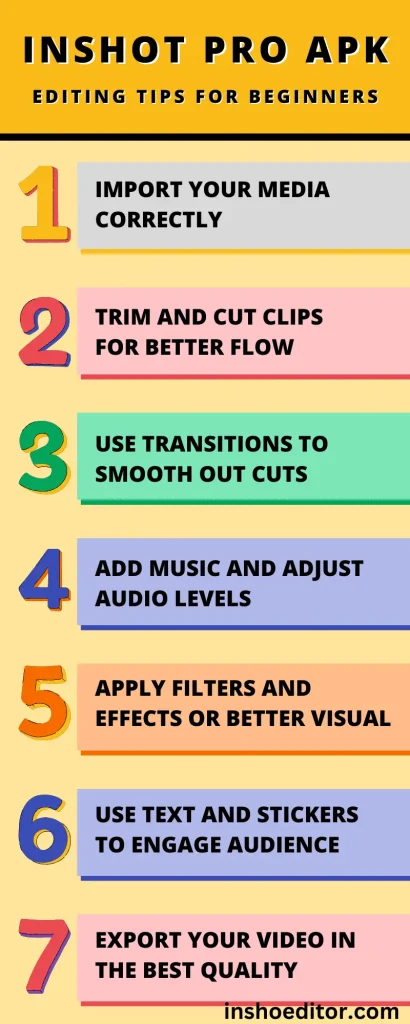
The first step in any editing process is to import your media files—your videos and photos. InShot makes it easy to import files from your phone’s gallery. Just tap on the “Video” button, and select the clips and images you want to use. Make sure your media files are of high quality to ensure a crisp final video.
2. Start with Trimming and Splitting Clips
For beginners, trimming and splitting are the most basic yet essential editing techniques. Trimming allows you to shorten your video clip by cutting out the parts you don’t want. To trim a clip in InShot, simply tap on the clip in the timeline and drag the yellow bars to your desired start and end points.
Splitting a clip allows you to cut a video into multiple sections. This is useful for removing unwanted parts or rearranging sections of your video. To split a clip, tap on the clip in the timeline, position the playhead where you want to split, and tap the “Split” button. These two tools will help you make quick and effective edits to your videos.
3. Add Music to Enhance Your Video
Adding music is a simple way to make your videos more engaging. InShot makes it easy to add music from your library or use the app’s built-in tracks. To add music, tap on the “Music” button, choose a track, and position it on the timeline to sync with your video.
It’s important to adjust the audio levels so that your background music doesn’t overpower the original sound in your video. To adjust the volume, tap on the music track in the timeline and use the volume slider. Balancing the audio will help your video sound professional.
Need the perfect track for your video? Explore our list of the Best Royalty-Free Music Sites for your next project.
4. Apply Filters and Effects for a Professional Look
Filters and effects can greatly improve the look of your video. InShot offers a wide range of filters that can change the mood of your video instantly. To apply a filter, tap the “Filter” button and choose from options like “Bright,” “Dark,” “Vintage,” or “Cinematic.”
InShot also has various effects like glitch, fade, and zoom that can add a creative touch to your video. To add an effect, tap the “Effect” button and browse through the options. Remember to use filters and effects sparingly to keep your video looking clean and professional.
5. Use Text and Stickers to Engage Your Audience
Text and stickers can make your videos more interactive and fun. To add text to your video, tap on the “Text” button, type your message, and customize the font, color, and style. You can move the text around and adjust how long it stays on the screen by dragging the edges of the text box in the timeline.
Stickers are a great way to add personality to your videos. InShot has a variety of stickers, including emojis and animated graphics. To add a sticker, tap the “Sticker” button, choose one that fits your video, and place it where you want it to appear. Just like with text, you can control the duration and position of stickers on your screen.
6. Export Your Video in High Quality
After editing your video, you’ll want to export it in the best quality possible. InShot allows you to choose the resolution and frame rate for your final video. For most purposes, a resolution of 1080p is a good choice. It provides a high-quality video without creating a huge file size. Tap the “Export” button, select your preferred settings, and save your video to your gallery or share it directly on social media.
7. Use Text and Stickers to Engage Your Audience
The more you use InShot, the better you will get at video editing. Start with simple projects and gradually take on more complex edits as you become more comfortable with the app’s features. Don’t be afraid to experiment with different tools and effects to find your style.
Final Thoughts
InShot is a great app for beginners who want to start video editing. By getting familiar with the interface, learning how to trim and split clips, adding music, and experimenting with filters and effects, you can create videos that look professional and stand out. Use these InShot editing tips for beginners to enhance your videos and start creating content that captures attention. Remember, the key to becoming a great video editor is practice, so keep experimenting and have fun with your edits!